Menu
Monday
9:00-5:00
Tuesday
9:00-5:00
Wednesday
9:00-5:00
Thursday
9:00-5:00
Friday
9:00-5:00
Saturday
9:00-4:00
Sunday
CLOSED
A custom photo frame is more than a border around a picture. It is a carefully planned display made for one image, space, and personal story. Unlike mass-produced frames, custom photo frames can match unusual dimensions, interior colors, and preservation needs.
The process begins with accurate measurements of the photograph, mat, and available wall space. A framer then recommends materials, including hardwood, metal, acrylic, glass, or conservation-grade backing. The choice depends on appearance, weight, budget, and exposure to sunlight. For valuable prints, UV-filtering glazing and acid-free materials can reduce long-term fading and discoloration. Small details matter. A two-millimeter mistake may create pressure around the artwork or leave an uneven border.
Experienced framers usually cut the frame components, join the corners, finish the surface, and assemble the layers with care. They may test the fit before sealing everything. This practical step can reveal warped wood, dust, or a mat that feels visually unbalanced. Not every decision is perfect. A darker stain may look attractive in a workshop but appear heavy beside a pale wall. That is why reliable makers discuss samples, lighting, mounting methods, and future maintenance with clients. Quality also depends on honest material descriptions and consistent inspection. This guide explores what custom photo frames are, how professionals make them, and which choices help create a durable, meaningful result. The final frame should protect the photograph while allowing its story to remain visible.
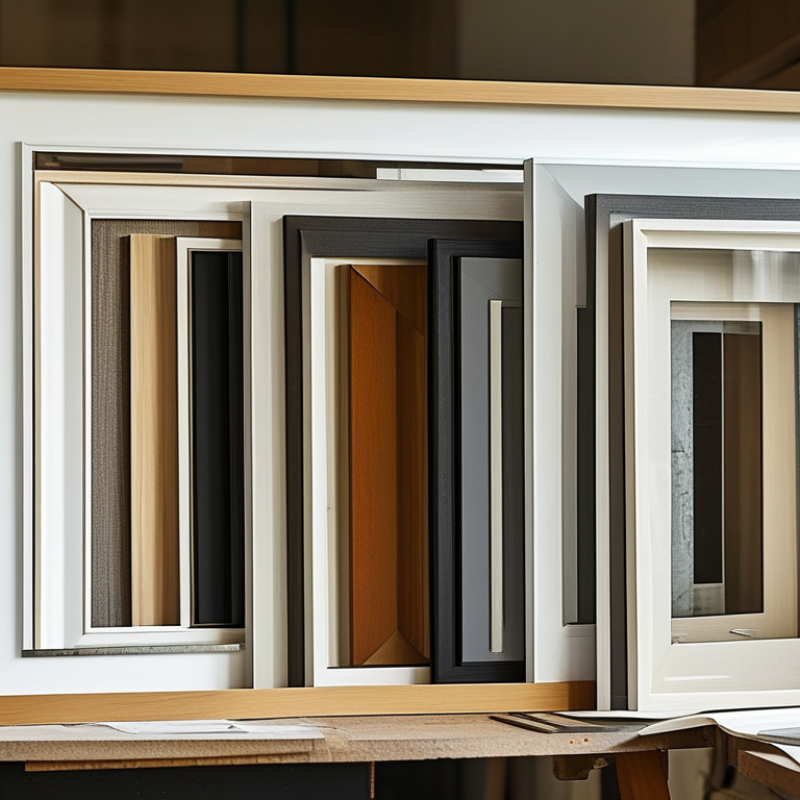
A custom photo frame is designed around one specific image, space, and visual preference. It may use exact dimensions, selected materials, a chosen finish, and protective glazing. Unlike a standard frame, it adapts to the photograph rather than forcing it into a fixed format. Its purpose is practical and emotional. It protects the print from dust, light, and accidental contact. It also gives the image a deliberate place in a room. The right frame can reduce distractions, preserve meaning, and connect a picture with its surroundings. That balance is easy to misjudge.
Making one begins with accurate measurement. The framer checks the image size, paper margins, mounting needs, and wall location. A mat can create breathing space around the photograph. A deeper frame can protect raised or layered artwork. The backing is cut to fit, then the components are assembled with stable, reversible materials where possible. Glass or acrylic is selected according to weight, safety, clarity, and sunlight exposure. Corners must meet cleanly. Before completion, the surface should be inspected for dust, pressure marks, uneven gaps, and color conflicts.
The frame’s purpose changes with the image. A family photograph may need warmth, while architectural photography often benefits from restraint. In professional framing, conservation matters. Acidic backing and excessive direct light can shorten a print’s life. I have learned that visual taste cannot replace careful fitting; an attractive frame may still overpower a small subject. That uncertainty deserves review. Viewing the piece from several distances and under normal room lighting often reveals problems missed on the worktable.

A custom photo frame is built around one image, not a standard opening. Its materials and proportions should protect the photograph while matching the room. According to Grand View Research’s 2024 picture frame market analysis, wood, metal, and plastic remain the leading material categories. Each behaves differently. Solid wood adds warmth but can expand with humidity. Aluminum stays precise and lightweight. Recycled plastic lowers weight, although its surface may feel less refined.
The making process begins with accurate measurements. A framer checks the image size, border space, glazing, backing, and hanging position. For valuable photographs, conservation-grade mat board and acid-free backing help reduce chemical damage. The Library of Congress recommends stable, archival materials for long-term photograph storage.
Low-reflection acrylic can be safer than glass in busy homes. It is lighter and less likely to shatter, but it scratches more easily.
Design choices should follow the photograph’s visual pressure. A black metal profile can sharpen a monochrome street image. Warm oak may soften a family portrait. The mat should create breathing room, not compete with the subject. According to Houzz’s 2024 U.S. home design research, homeowners continue investing in personalized spaces, which supports demand for made-to-measure décor. Still, customization is not automatically better. I have seen oversized mats make small images look lost. That mistake is easy to repeat. A smaller frame, deeper mat, and discreet hanging hardware may serve the image better.
A custom frame begins with the photograph, not the frame moulding. Measure the visible image area, including its width and height in millimetres. Do not measure the paper border unless it will remain visible. A 3 mm error can create an uneven edge or expose the backing board.
The International Organization for Standardization defines A4 paper as 210 × 297 mm under ISO 216. That standard helps when checking common print sizes, but personal photographs often use different proportions. Measure the frame opening, mat window, and frame rebate separately. The rebate is the inner channel holding the glazing, artwork, and backing. Its depth matters. A thick mounted print may not fit.
Prepare the digital file at the intended output size. Library of Congress digitization guidance commonly uses 300 pixels per inch for photographic reproduction. At 8 × 10 inches, that means roughly 2,400 × 3,000 pixels. Keep the original file untouched, then create a working copy. Check the crop ratio before printing. Faces near the edge are easily cut off.
Use a calibrated screen when possible, and save in the color profile requested by the printer. I still recheck measurements after printing; paper can shift slightly during handling. That small step feels unnecessary, until it prevents an expensive remake. A test print also reveals dull shadows, unexpected borders, or a crop that looked acceptable on screen but feels cramped in the hand.
What Is a Custom Photo Frame and How Is It Made?
A custom photo frame is designed for one specific image, space, and visual style. It can use wood, metal, acrylic, or carefully finished composite materials. The process begins with accurate measurements of the photograph and display area. I allow a small margin around the image for safe mounting. A one-millimeter error can affect the entire fit. Precision matters.
The image is printed on suitable paper and checked for color, sharpness, and cropping. Archival paper and acid-free backing help reduce fading and discoloration over time. The frame material is then cut, sanded, and joined at precise angles. A protective glass or acrylic panel is placed above the image. Spacers may be added to prevent the picture from touching the surface. Each layer should remain clean and dust-free.
The backing is secured with flexible points, while hanging hardware is attached according to the frame’s weight. I check the corners, alignment, and rear support before delivery. My first mock-up once showed a slightly uneven border, although the measurements looked correct. The issue came from shifting paper during mounting. That mistake reinforced a useful lesson: dry-fitting every part prevents avoidable corrections. A final inspection under natural light can reveal fingerprints, tiny scratches, or unwanted shadows.
| Step | Production Activity | Typical Materials or Tools | Common Reference Data | Quality Check |
|---|---|---|---|---|
| 1. Define the Design | Confirm the photograph size, frame style, finish, mounting method, and display orientation. | Design drawing, measuring tape, frame samples, color references | Common photo sizes include 4 × 6 in, 5 × 7 in, and 8 × 10 in. Portrait and landscape orientations are both possible. | The selected frame opening matches the intended photograph and mat arrangement. |
| 2. Select the Materials | Choose the frame moulding, glazing, backing board, mat board, hardware, and surface finish. | Wood, metal, plastic, glass or acrylic glazing, mat board, backing board, hanging hardware | Frame moulding is commonly about 15–50 mm wide. Standard glass is often about 2–3 mm thick; acrylic is lighter and more impact-resistant. | Materials are free from cracks, deep scratches, warping, stains, and incompatible finishes. |
| 3. Calculate the Frame Size | Calculate the outside dimensions from the image opening, mat border, frame width, and construction joints. | Ruler, square, calculator, cutting list | For a 5 × 7 in photo with a 2 in mat border, the visible mat assembly is approximately 9 × 11 in before adding the outer frame width. | All measurements account for the rabbet, glazing, mat, photograph, backing, and clearance. |
| 4. Cut the Frame Components | Cut four moulding pieces, normally with opposing 45-degree mitre cuts for a rectangular frame. | Mitre saw, mitre box, saw blade, clamps, pencil, safety glasses | A 90-degree rectangular corner is formed by two accurate 45-degree cuts. The cut list must include the moulding profile and rabbet depth. | Opposing pieces have equal lengths, clean cuts, and corners that meet without visible gaps. |
| 5. Join the Corners | Apply suitable adhesive, align the mitres, and reinforce or clamp the assembly while it cures. | Wood adhesive or compatible frame adhesive, corner clamps, brads or joining wedges | Clamping and curing time depends on the adhesive; many woodworking adhesives require several hours before handling and approximately 24 hours for full cure. | The frame is square, rigid, and free from adhesive squeeze-out on visible surfaces. |
| 6. Prepare the Surface | Sand, seal, paint, stain, or otherwise finish the frame according to the selected design. | Sandpaper, primer, stain, paint, clear coat, clean cloth | Wood surfaces are commonly sanded progressively from coarse to finer abrasive grades, such as 120 to 180 grit, before finishing. | The finish is even, dry, smooth to the touch, and free from runs, bubbles, dust, or exposed raw areas. |
| 7. Cut the Mat and Backing | Cut the mat opening and backing board to fit the frame rabbet and position the photograph securely. | Mat cutter, cutting ruler, craft knife, mat board, foam board or rigid backing | A bevelled mat opening is often cut slightly smaller than the photograph to prevent the image from slipping through. | The opening is centered, edges are clean, and the photograph lies flat without excessive pressure. |
| 8. Clean and Assemble the Layers | Clean the glazing, then stack the glazing, mat or photograph, backing board, and frame retainers in the correct order. | Lint-free cloth, glass cleaner suitable for the glazing, gloves, glazing points or clips | Typical layer order: glazing first, mat and photograph next, then backing board. The exact order may vary for special mounting designs. | No fingerprints, dust, hair, moisture, or scratches are visible between the layers. |
| 9. Install Hardware | Attach the backing retainers, hanging hardware, stand, or wall-mounting components. | Turn buttons, points, D-rings, wire, sawtooth hanger, easel stand, screws | Hardware selection depends on frame weight, orientation, and whether the frame is intended for tabletop or wall display. | Hardware is firmly attached, correctly aligned, and suitable for the finished frame weight. |
| 10. Perform the Final Inspection | Check dimensions, squareness, finish quality, glazing condition, photograph position, and hardware security. | Square, ruler, soft cloth, inspection light, packaging materials | A finished rectangular frame should have parallel sides, even corner joints, stable backing, and a clean viewing area. | The frame is ready for display when it is clean, stable, accurately assembled, and free of visible defects. |
A custom photo frame becomes convincing through careful finishing, not decoration alone. After cutting and joining the frame, inspect every corner under bright, angled light. Sand the surface with 180- to 220-grit paper, following the wood grain. Small details matter. Remove dust with a soft, dry cloth before applying paint, stain, or clear finish. Thin coats usually look more even than one heavy coat. Allow each layer to dry fully, even when the surface feels dry. I have found that rushed finishing often leaves cloudy patches or visible brush marks. That mistake is easy to avoid, but not always easy to repair.
Protection should match the photograph and its environment. Use acid-free backing and a quality mat to reduce contact between the image and glazing. UV-filtering glass or acrylic helps slow fading, especially near a sunny window. Acrylic is lighter, but it can attract dust and scratch more easily. Keep the photograph slightly separated from the glazing in humid rooms. A small air gap can prevent condensation. The frame should hang on a secure fitting, with both sides level and the weight supported properly. Avoid placing it above heaters or in damp areas. Handmade frames may show slight variations in color or alignment. That is not automatically a flaw, though inconsistent joints deserve correction before display. Check the frame from several distances, because a finish that looks perfect up close may appear uneven across the room.
A custom photo frame is built to the artwork’s exact size and display requirements. The process usually includes measuring, cutting and joining the frame, adding a protective glazing layer, mounting the photograph with suitable materials, and preparing the finished frame for display.
The chart shows typical conservation display targets for different material sensitivities. Light-sensitive photographs and works on paper are commonly displayed at lower illuminance levels, while more stable materials can tolerate higher levels. UV-filtering glazing, archival mounting, and controlled lighting help protect the finished frame.
